Using QuickOSM to download OpenStreetMap data in QGIS
Sometimes you need roads, buildings, or other random bits and pieces that you aren’t going to be able to download from the city/state/federal government. That’s where OpenStreetMap comes in handy!
There are a few ways to import OSM data into QGIS - this one is the easiest for me, but if you stumble across something else feel free to use it.
First, start with a blank new project.
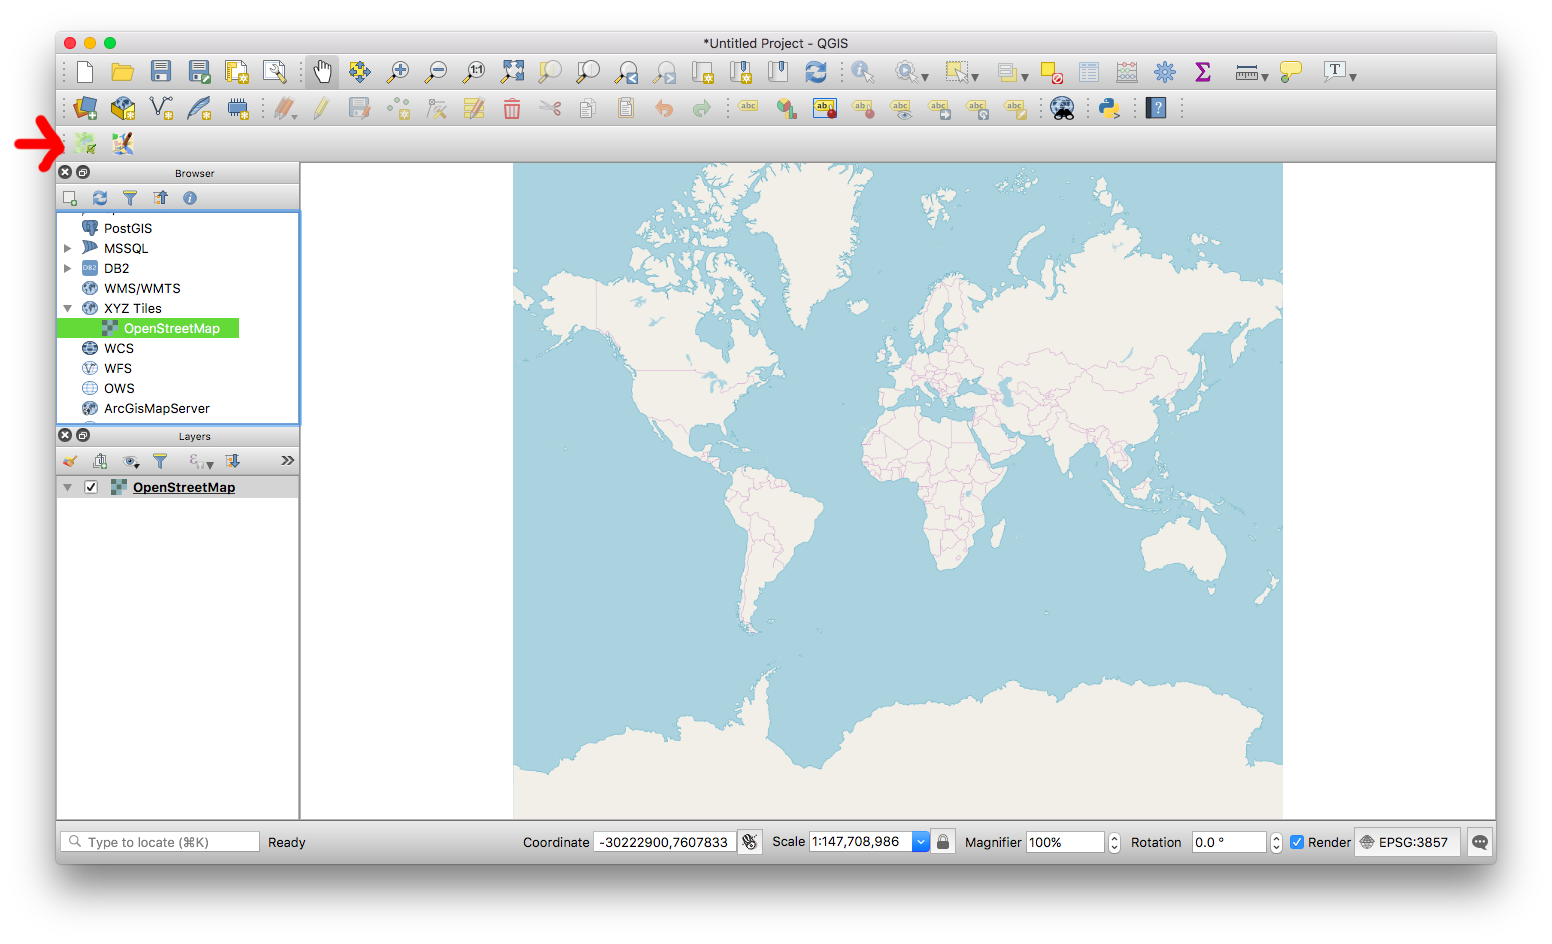
Now we’re going to add an XYZ tile layer.
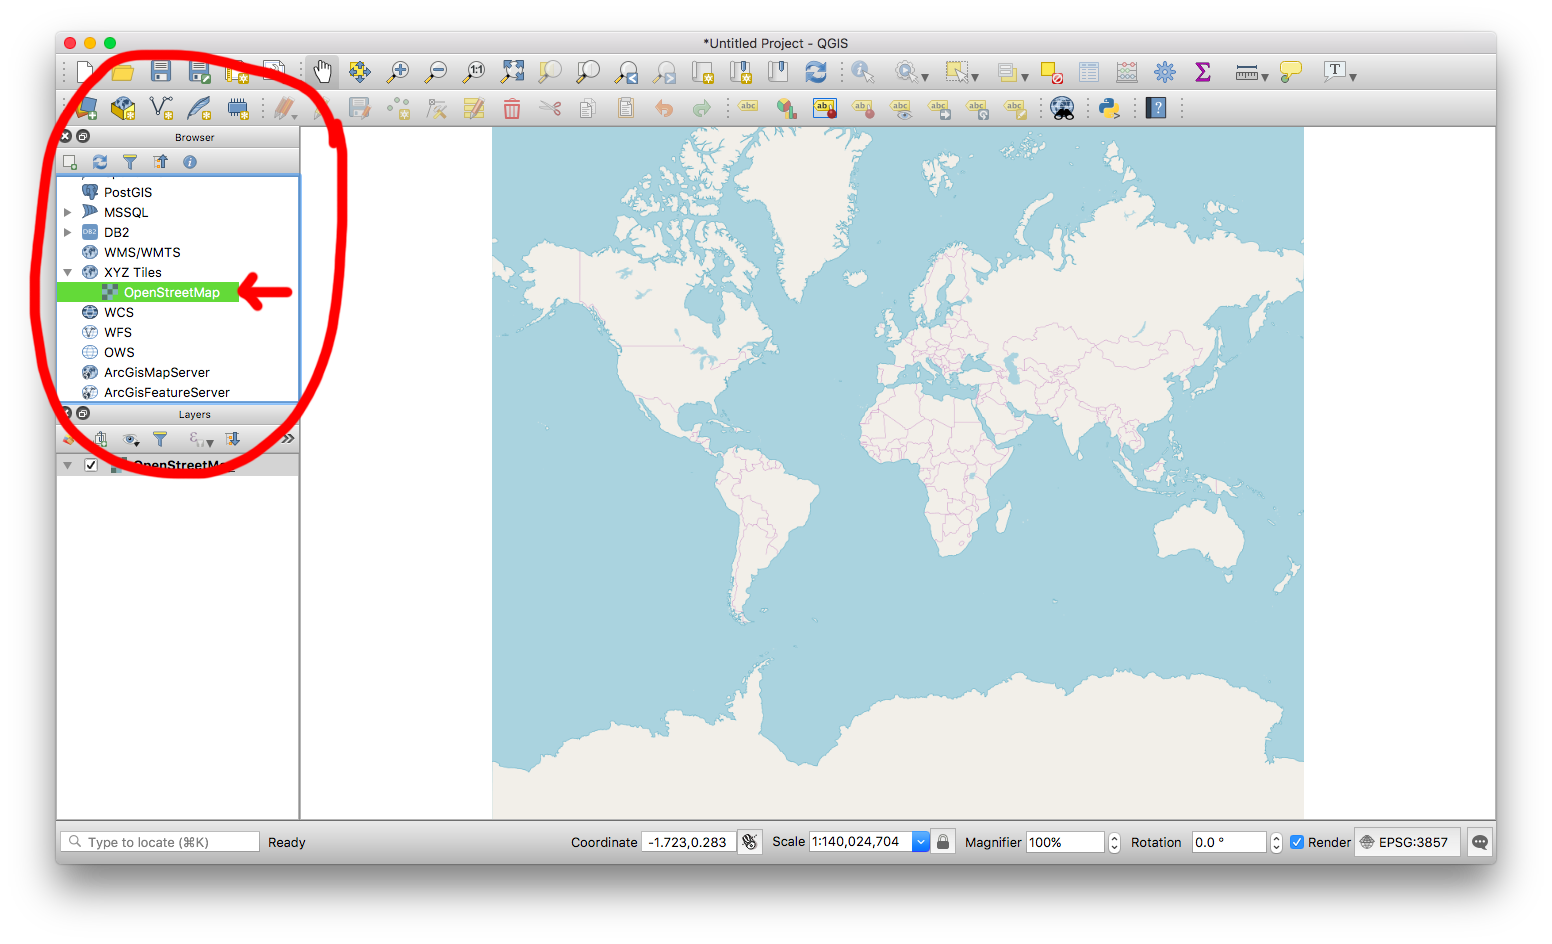
This is like adding Google Maps to your project, but just as an image. You can’t style or select things on this layer, we’re just going to use it for reference.
To add an OpenStreetMap XYZ (image) layer, look at the Browser panel on the top left, and scroll down until you see XYZ Tiles. Inside is OpenStreetMap - double-click it.
If you don’t have a Browser panel, go to View > Panels > Browser from the top menu.
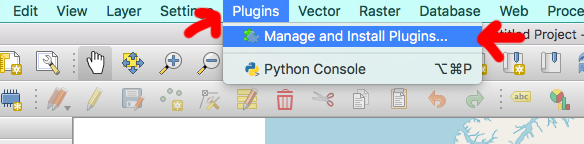
Now we’re going to install the QuickOSM plugin. If you have it, you can skip this part! First, select Plugins > Manage and Install Plugins… from the top menu.
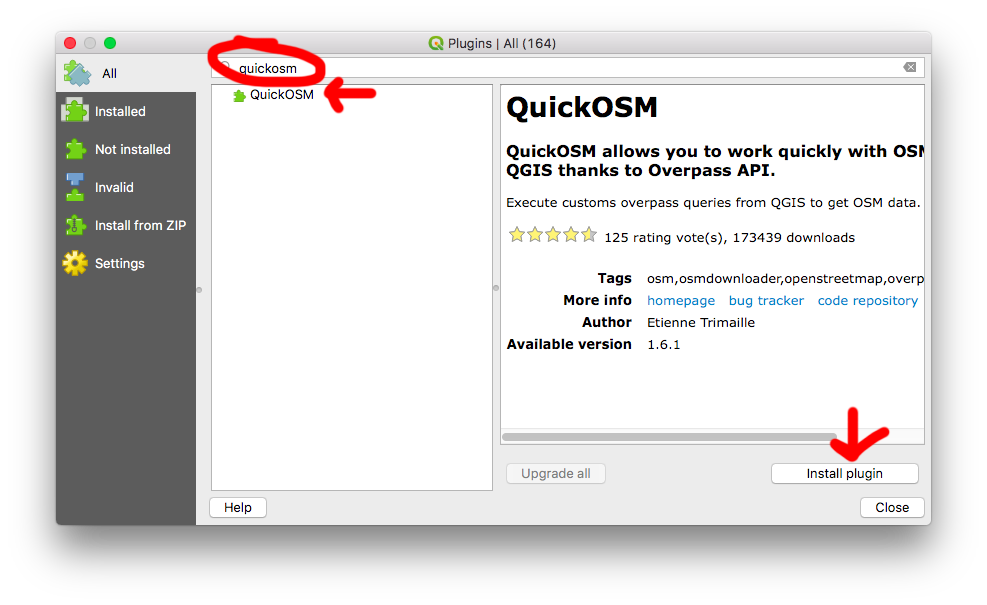
Search for QuickOSM, select it from the list, and click Install plugin.
You’ll know it installed because there’s now a new button in a new toolbar, just for QuickOSM.
Now it’s time to get your OSM data! Start by zooming in to where you want to get roads/buildings/etc from. The closer the better - if you start from far out you’re going to have to download a looot of stuff.
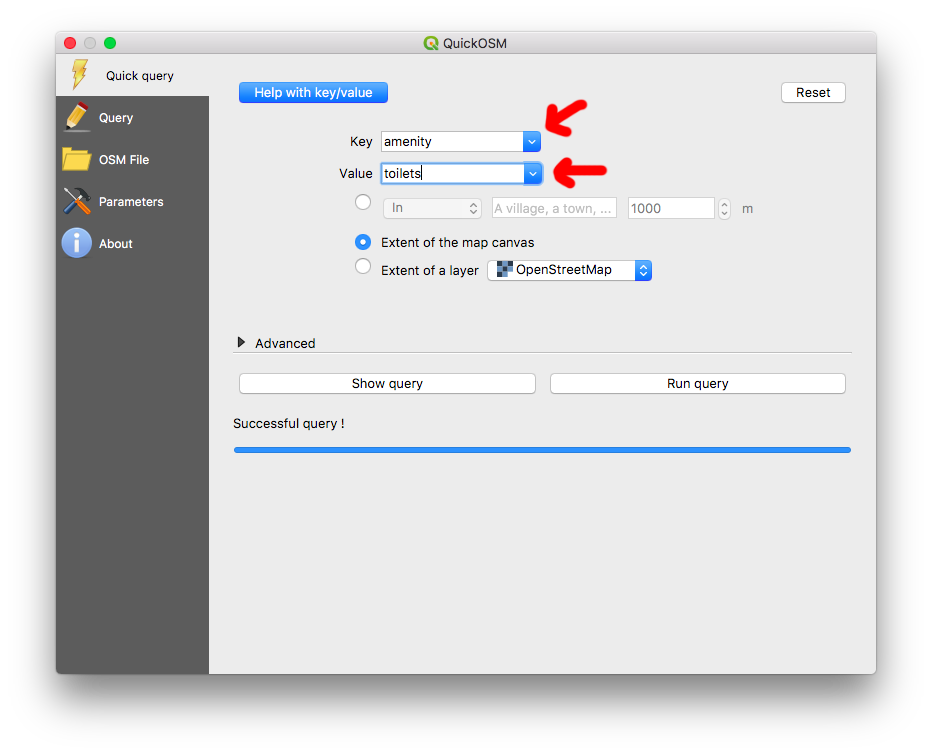
Once you’re in the right area, click the QuickOSM button. You can then filter the type of data you want (for example, buildings), as well as the area. In these examples, I leave them as “Extent of the map canvas,” which means “only download what’s in my screen.”
If it seems slow, just wait! If you get a timeout error, just try again!
If you’d like to download roads, I recommend getting both highways and routes.
You can also filter by subcategory, as you can see below.
Once you’re done you can remove your XYZ layer and you’re good to go for styling!