Creating a Digital Ocean server for scraping
We’re going to use a server - this one in particular is fine for repeating tasks or scraping, but you could also use a high-memory or high-CPU one for data processing tasks.
Step One: Registration and navigation
In order to run a server, you’ll need a Digital Ocean account. That link gives you $10, although you do need to give them $5.
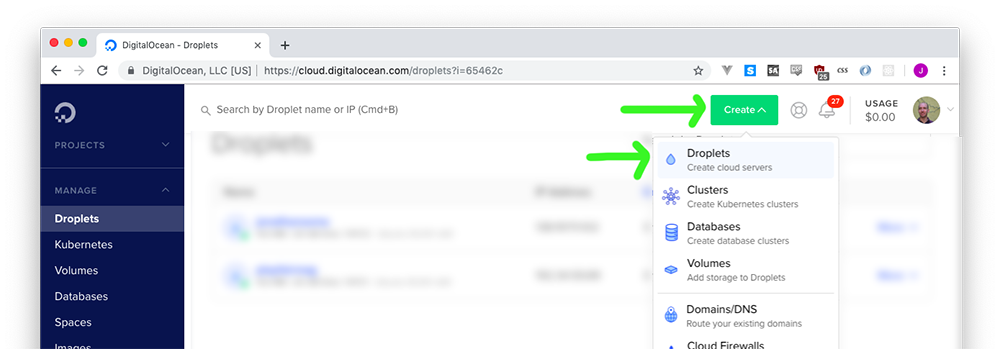
Once you’re registered, visit the Create Droplet page from the top menu.
Step Two: Filling in some blanks
Picking an operating system (image)
First, for our operating system we are going to pick Ubuntu. It’s an operating system like OS X or Windows, except it’s a version of Linux instead.
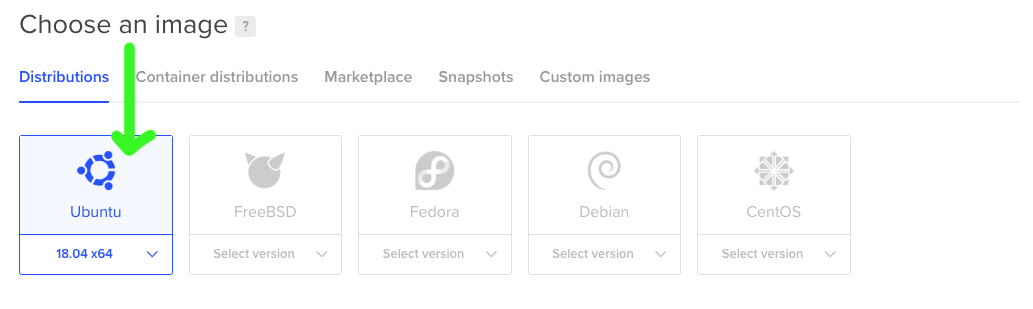
We’re using it because it’s the most common version of Linux used in the “cloud.”
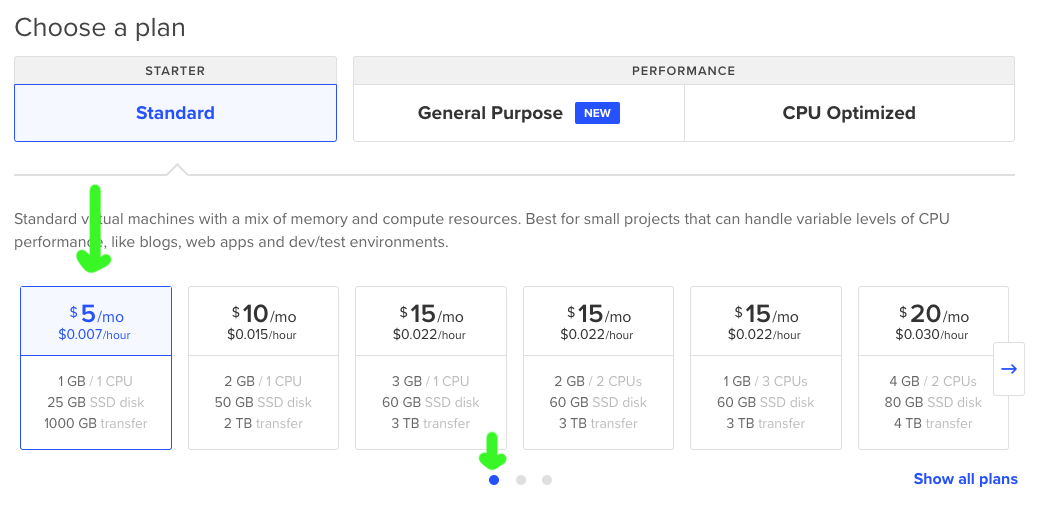
Picking a server size (plan)
Then we’re going to pick the smallest size server. We don’t need anything bigger right now.
Click the left arrow for smaller sizes, the default is $40/month but going to the left shows you $5/month.
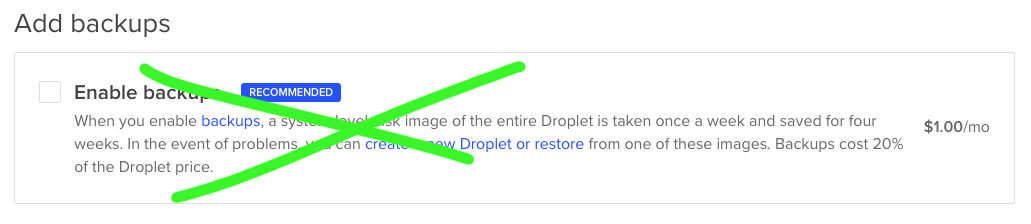
Backups and block storage
We don’t need any backups or block storage.

Datacenter locations
Datacenter locations don’t matter too much, but feel free to pick one closer to you.

Additional Options
We don’t need any additional options.

SSH Keys
Click New SSH Key if you don’t have one already there to use.
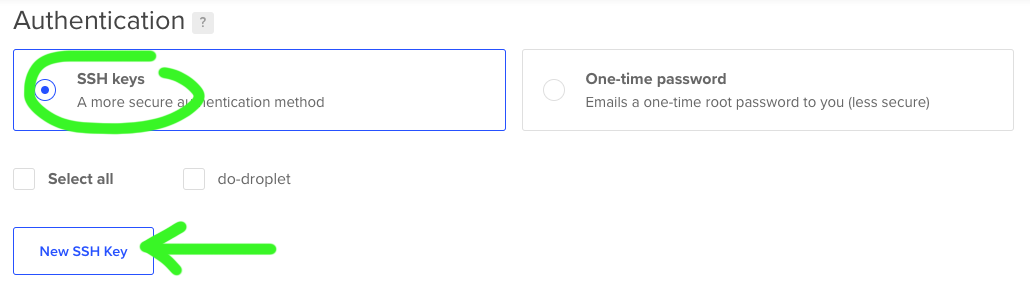
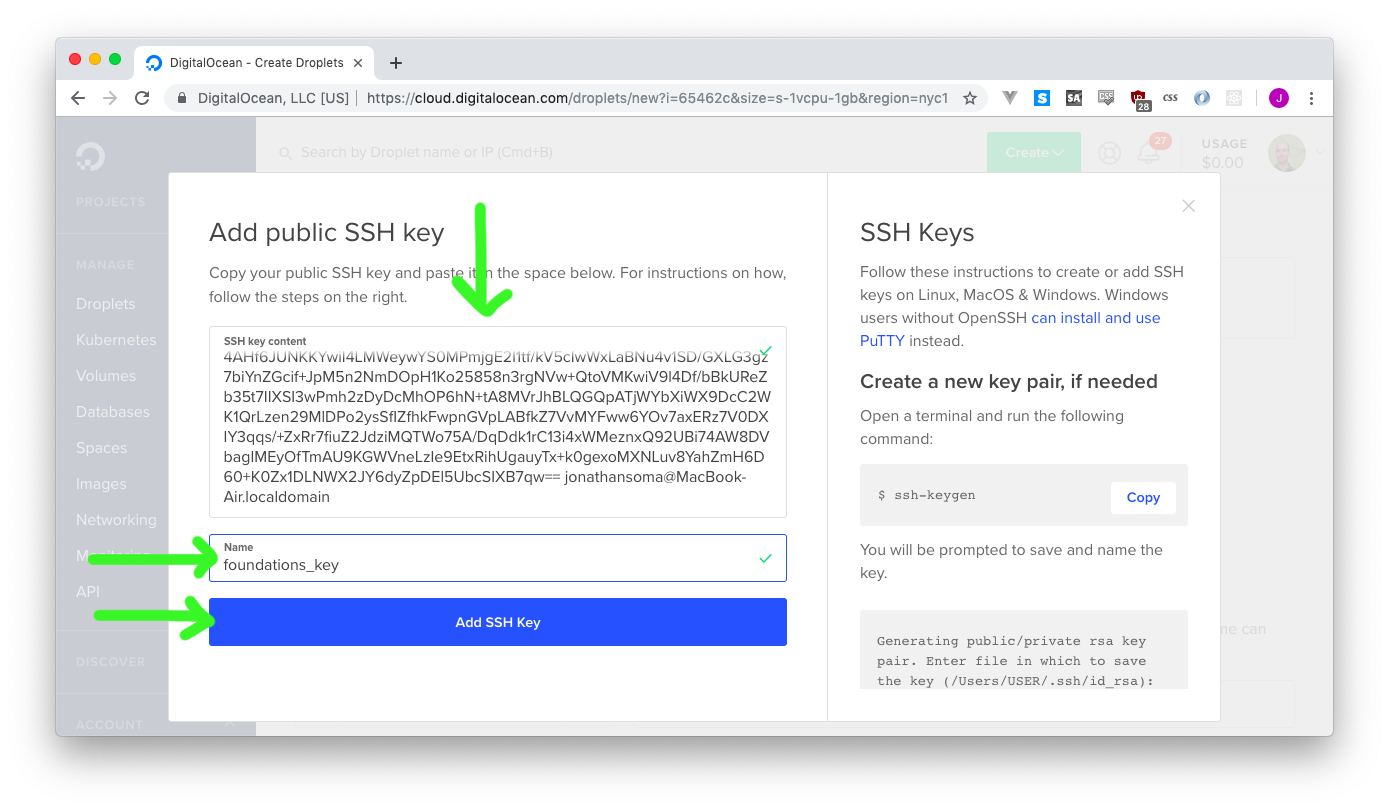
You’ll be confronted with a window! This is where you’re going to put your public key. Read Step Three to learn how those are created.
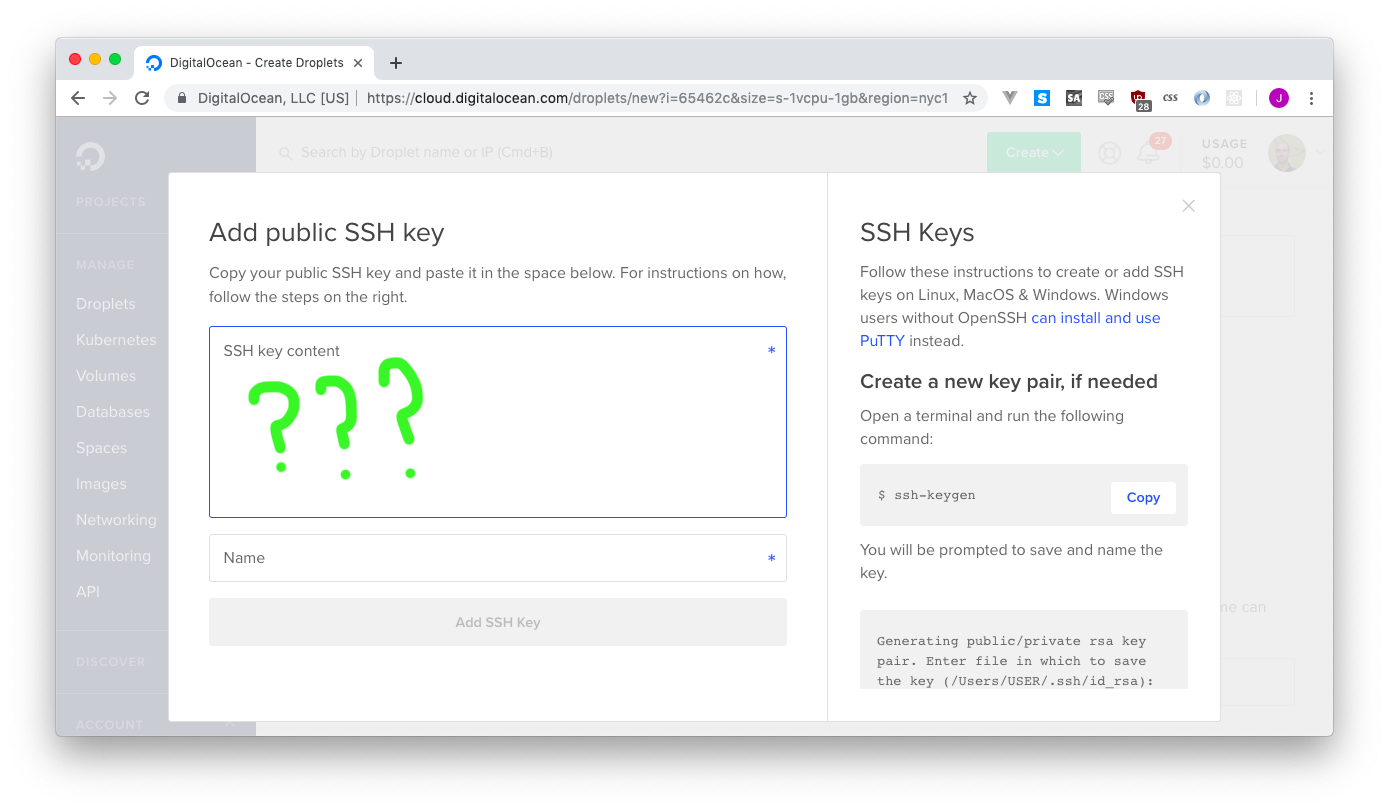
Step Three: Creating and using a public key
Instead of a password, we’re going to use a special file that proves who we are.
This is called an SSH key - it has two parts, a public key that we give out to people and web sites, and then we keep a private key to prove that yes, we are who we say we are. That’s the super short way of explaining it.
Windows
For Windows, if you’re using cmder you should be able to use the OS X tutorial, except instead of ~/.ssh/foundations_key you’ll always type C:/foundations_key.
ssh-keygen -f C:/foundations_key -t rsa -b 4096
If that fails, follow this guide.
OS X
For OS X, you could follow this guide but really, just open up the command line and run the following command. It will ask for a passphrase, but hit enter to skip it.
ssh-keygen -f ~/.ssh/foundations_key -t rsa -b 4096
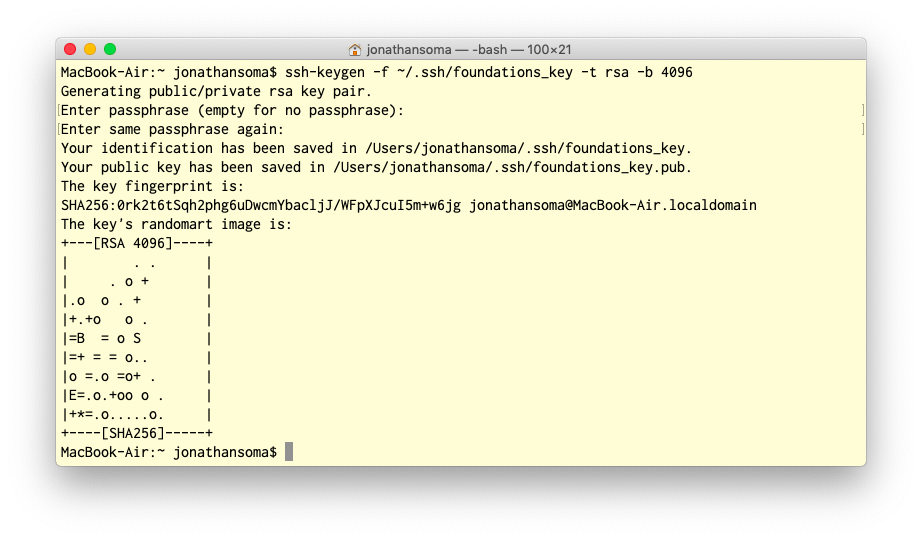
This will create two files, foundations_key and foundations_key.pub, in a secret folder called .ssh.
For the next step, make sure you are opening foundations_key.pub (your public key) and NOT the foundations_key file (your private key). It should start with ssh-rsa, and not be very long:
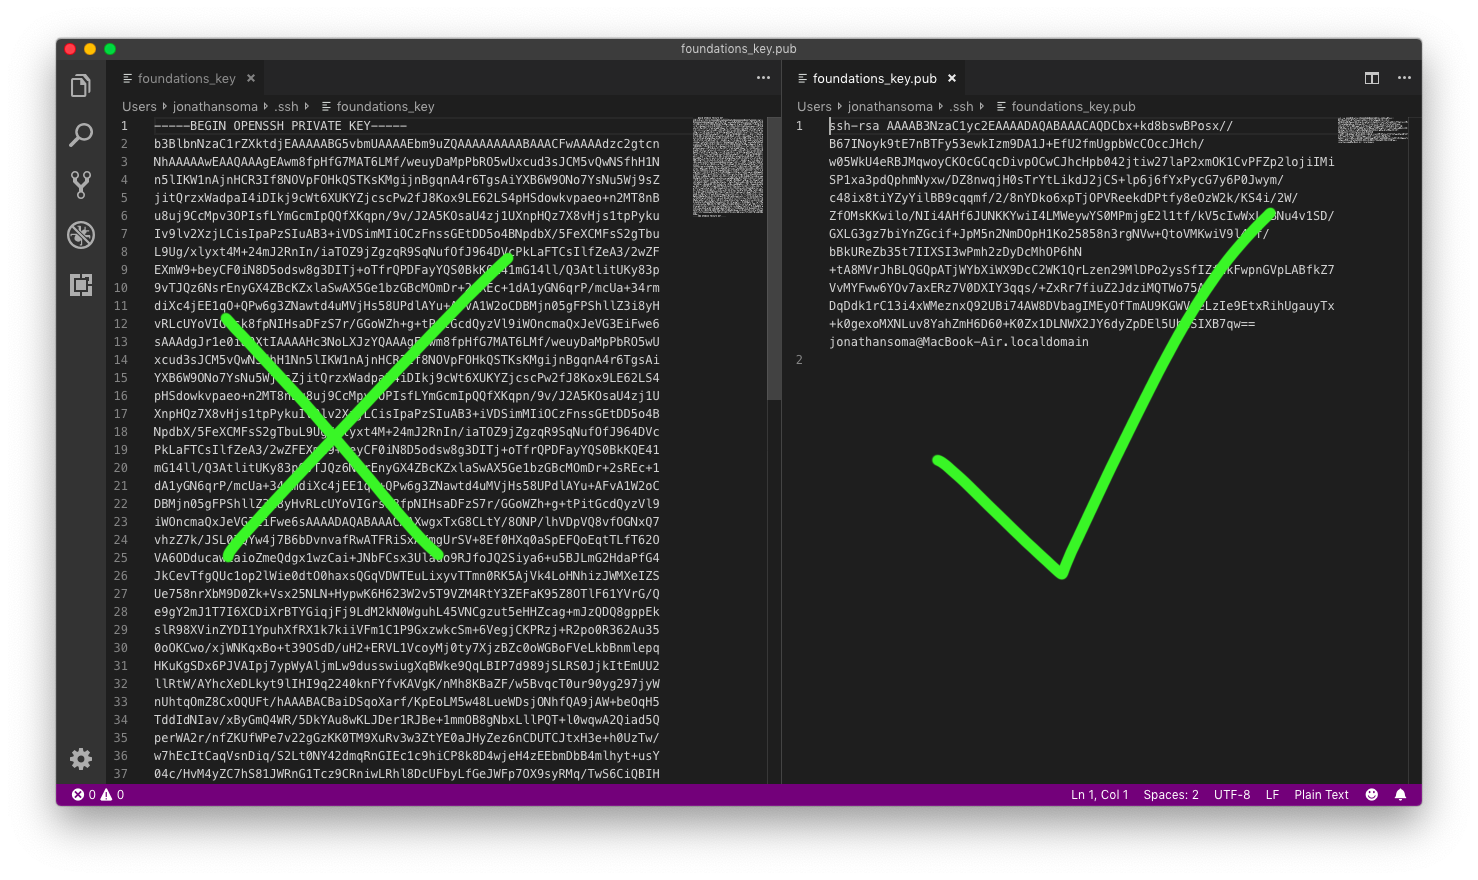
- Look at
foundations_key.pub, either on the shell withcat(see below) or in Visual Studio Code - Paste the entire file into the box on Digital Ocean
- Name it
foundations_key - Click Add SSH Key.
Note: You can see the file from Terminal by typing
cat ~/.ssh/foundations_key.pub.
If you want to use VSCode: open up Finder and bring up the “Go to folder” option by pressing
Command+Shift+G, or clicking Go from the top menu, then Go to Folder. Type~/.sshand hit enter. You can drag the file to your text editor.
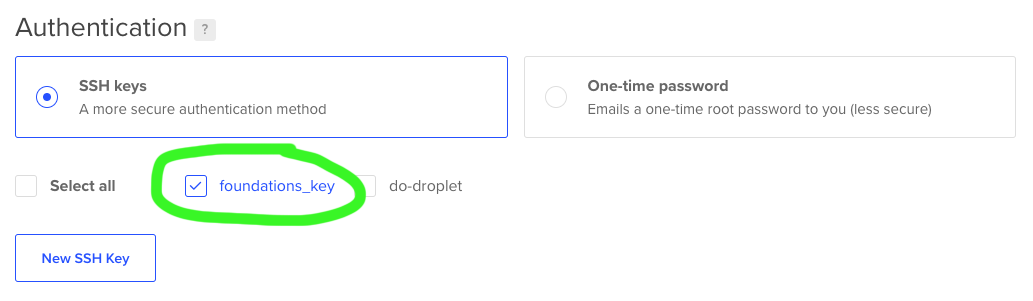
Digital Ocean will automatically select the appropriate checkbox.
Finishing Up
Down at the bottom you can confirm you only want one droplet (aka one server), and you’re able to name it. It doesn’t matter what you name it, since you probably won’t be running a hundred different ones.
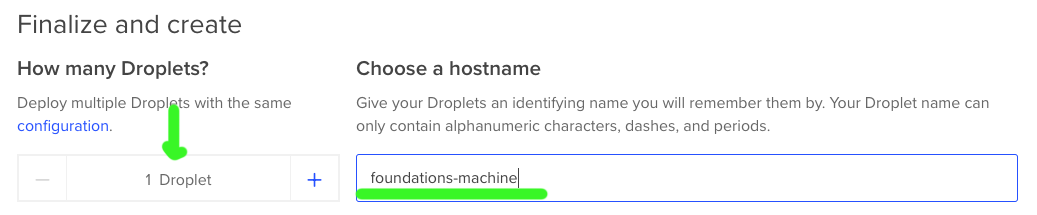
Then click Create to finish

Setting up your server
If I’ve told you to, now you can move on to setting up your server