3 Setting up our database
When you’re Serious About Data (which we are, of course), you store your data in a database, not an Excel spreadsheet or CSV file. They’re faster and more flexible, even if you use a terrible baby database format like we’re going to use.
3.1 Intro to SQLite
Our database is going to be a SQLite database, which is perfect and wonderful because it’s just a file. If I want to send you my database, I can just send it to you via email or Dropbox or whatever - no playing around with installing things or servers or anything like this. It’s not the best database by any means, but it’s easy! Think of it like a small upgrade to a CSV file.
If you want to put something on the web, you’re welcome to use any kind of database you’d like. We’re going to use TablePlus to manage our data, and feel free to connect to a PostgreSQL instance or a MySQL server or anything else you’d like if that’s more your speed.
3.2 Creating a new SQLite database
To create our new SQLite database, we’re going to start with a CSV file. We’re going to use this one, which is a list of schools in New York City. Download it and save it to the same directory as app.py.
To create a new SQLite database from your CSV file, you’re mostly going to follow these instructions, except database creation is a little different:
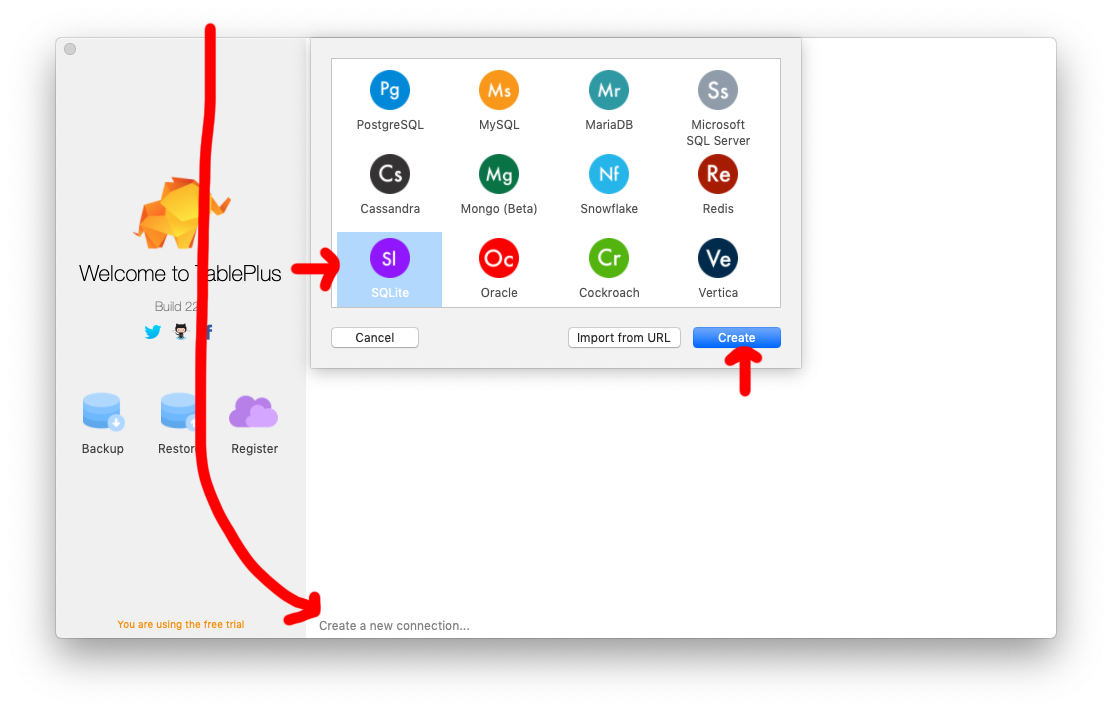
- Select SQLite after clicking Create a new connection.
- Type
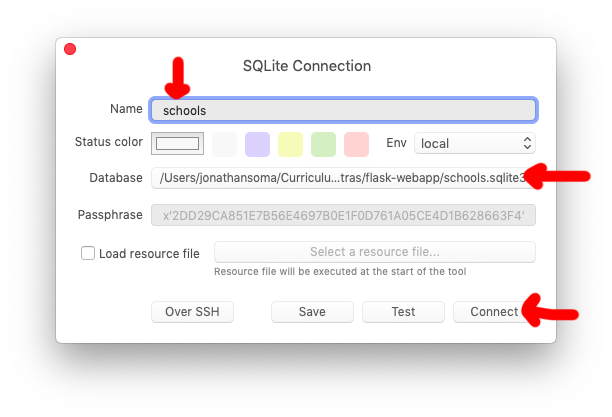
schoolsin Name. This is the nickname TablePlus will refer to it by. - Click Select database, pick your folder that
app.pyis in. When it asks for a name, sayschoolsagain. This will be the name of the actual database file. - Then click Create
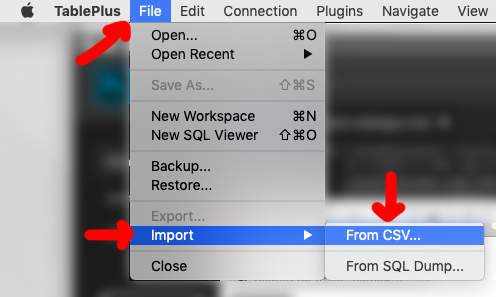
Now begin the import using File > Import > From CSV….
Make sure create new table and first line is header are both checked, then complete the rest:
Most of the data types should be okay, but…
- Change the very first column - the numbered one without a name - to have the column type
Do not import - Change the following columns to be text:
ZIP,block,county_fips,state_fips,tract,zipcode(sorry, I didn’t clean this up after I converted addresses into lat/lon) - Also select the ‘City’ and
addresscolumn types toDo not import(we already have anADDRESSandcitywhich are the same!)
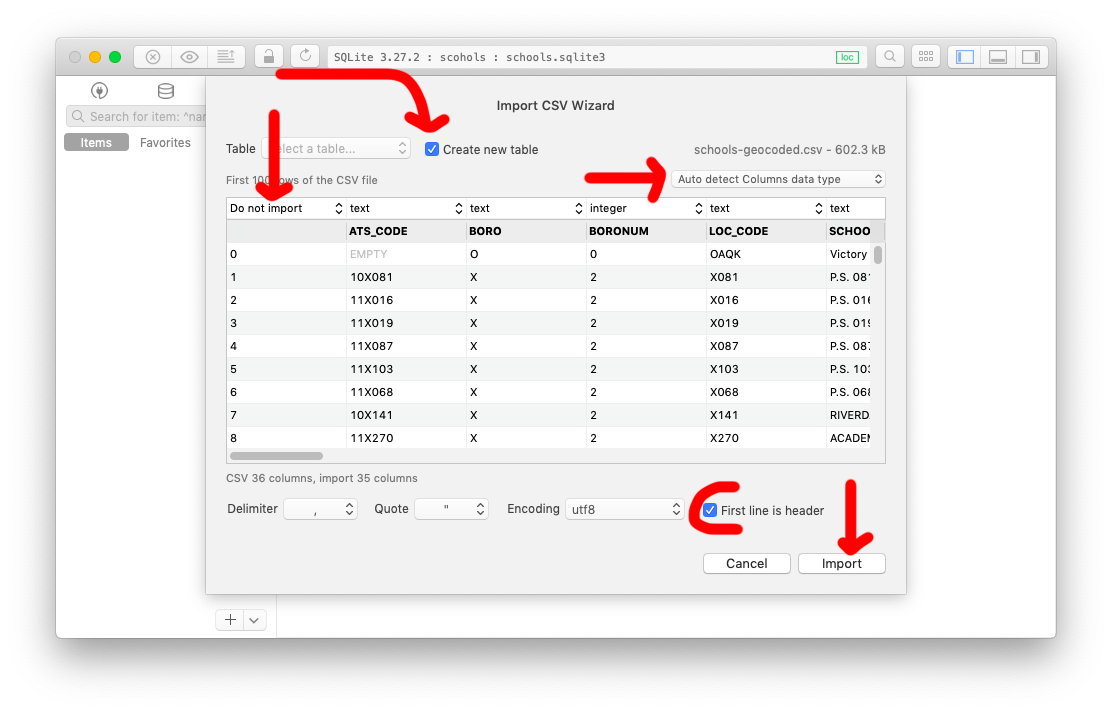
When you’re reasonably confident you’ve done it all correctly, click Import. Give it a minute to process, TablePlus can be a little awkwardly slow sometimes. It’s pretty, though, so we’ll trust it.
3.2.1 Double-checking the import
Once it looks like you’re done, briefly double-check that everything imported correctly by click the Refresh icon at the top of the screen.
You should see the schools-geocoded table appear on the left-hand pane of TablePlus. Click it and you should see the center pane fill up with schools!

You’ll always forget to click Refresh. Constantly. Every day. And you’ll be confused, every time, wondering where your data is. Every second, always forgetting to click refresh. Don’t forget!
Now it’s time to take our incredible database and connect it to our incredible website. Let’s go!