Using GitHub Desktop
If you prefer a video version, there's one at the bottom of the page.
The basics
What and why
git is a command-line tool that allows you to create checkpoints - called commits - when you're working on coding projects. It's kind of like how Dropbox or Google Docs saves versions of your old work!
Instead of being focused on individual files, with git you create collections of files called repositories. You can think of a repository as a folder full of files you're keeping track of.
Become we live in a wild and social time, GitHub is a website where you can store or share your repositories. If your repository is public, other people can read your code and even contribute improvements or bug reports!
For example, I made a project called Tabletop ten thousand years ago. It was awful until another 27 people helped make improvements to it!
In data journalism, sharing methodology, code and data is an important part of the process for many news organizations. Sharing git repositories on GitHub is an excellent way to do that – for example, BuzzFeed News does a great job keeping their analysis reproducible and available.
With what
While it's very popular and very useful, git is an awful command-line tool. You can read people fighting about it here. It's hard to use, nothing makes sense, and it's just... it's just not fun.
So instead we'll use GitHub Desktop. It takes care of git on your machine, and will also is in charge of sharing your repositories to GitHub. It isn't as powerful as the command-line tool, but it's far easier to use. Download it.
To be able to share your code on GitHub, you'll also need to create a GitHub account.
How to
Organize your files
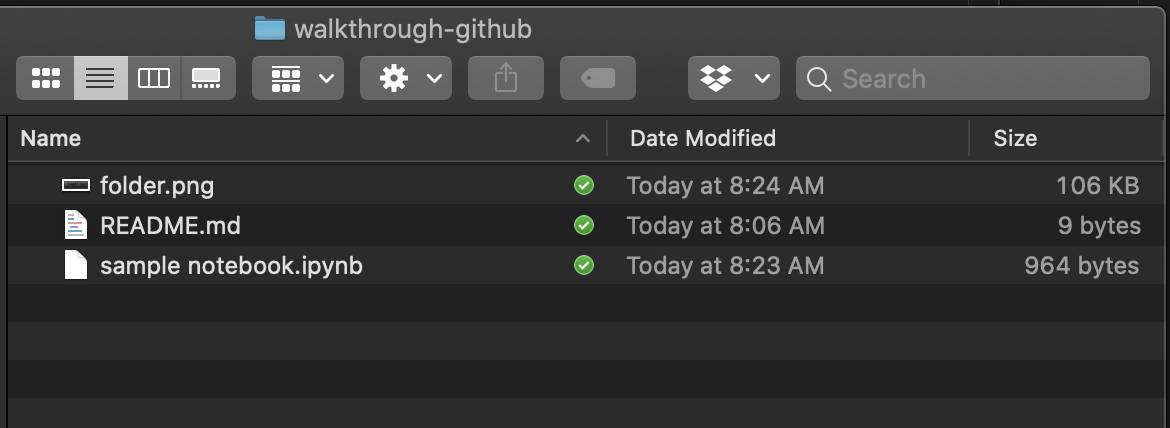
For one repository (aka one project), put all of the files you want to track in a single location. git won't be able to keep track of anything if you spread them across multiple directories. For example, you might have a squirrel-analysis directory or a data-homeworks folder.
Each directory will be turned into a repository that can be shared online.
Special files
You don't need these files, but they're nice to have.
README.md
If you want to write a short document explaining what a repository is, use a README.md. This description will automatically show up when someone looks at the repo.
The .md stands for Markdown, a way of formatting text without using Docs or Word. Read a quick Markdown reference here. Right now you're reading a README.md written using Markdown!
.gitignore
The .gitignore file is files you want git to.... ignore! Maybe you want it to ignore the weird .DS_Store files macOS puts everywhere, or a test dataset you were looking at.
I usually go to gitignore.io and get one made for VS Code, Python and macOS.
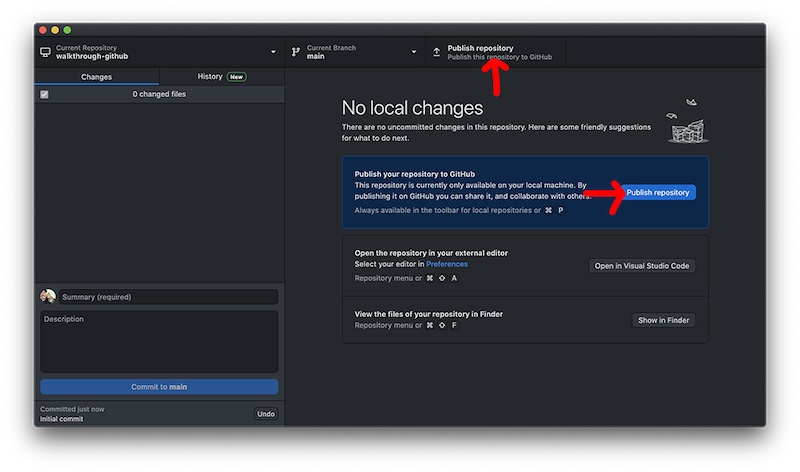
Creating and publishing your repository
After you're all set for ✨✨everyone in the world✨✨✨ to be able to see your content, we're going to create a repo, make a commit, and push everything up to github.
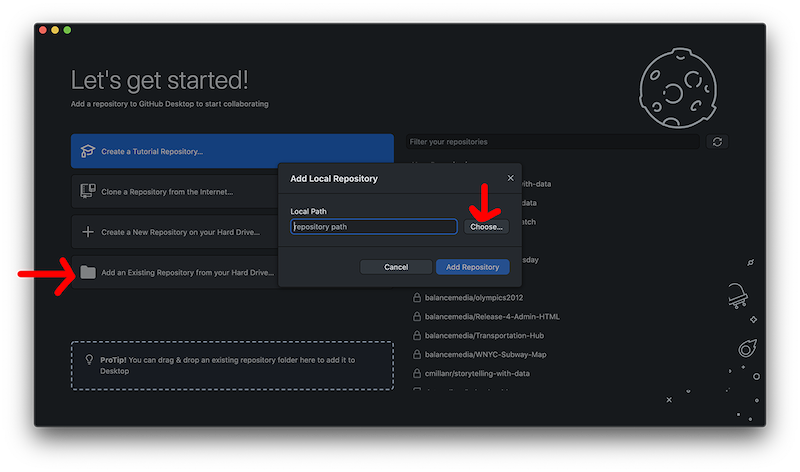
GitHub Desktop is kind of tricky about how it creates a repository. Do not try to click "Create a New Repository on your Hard Drive" because I guarantee it won't do what you think.
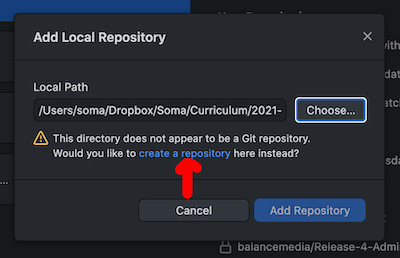
- Click Add an Existing Repository to your Hard Drive.
- Click Create a repository instead
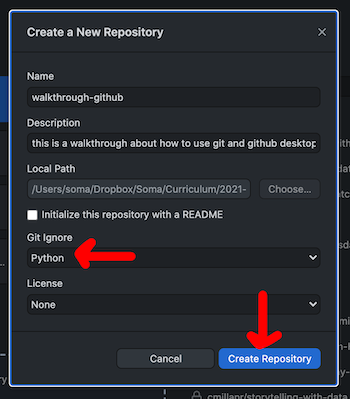
- Write a description. You can add a
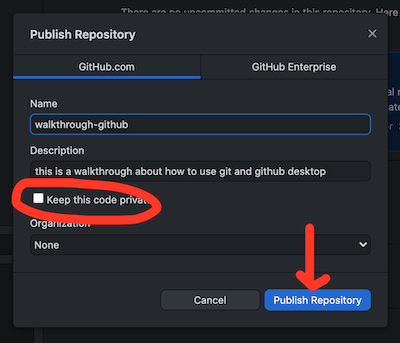
.gitignoreif you'd like, too. - Publish your repository
- You can choose whether you keep your code private or not
Publishing updates
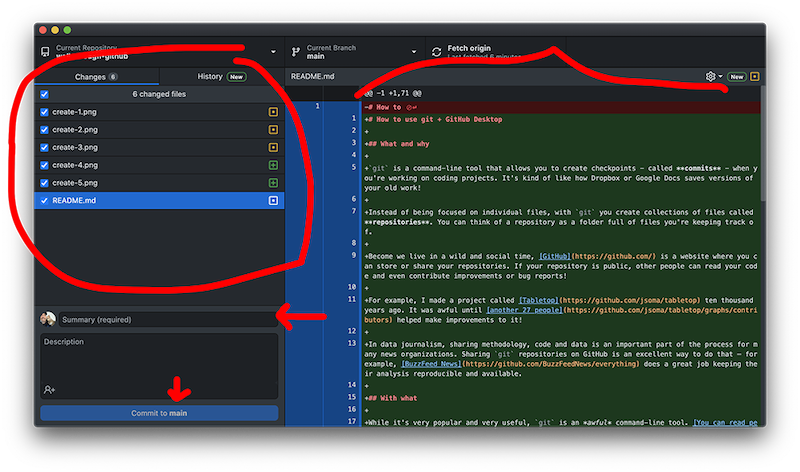
Every time you want to save a checkpoint, you need to make a commit.
When files change in your repo, GitHub Desktop will ask you which changes you want to save (probably all of them!), and ask you to write a short description.
Once you write the description, you can Commit to main.
When you're a wild software developer using git, working on different features for a product, you might have multiple versions of your code (aka branches). We're normal people, though, so we'll just always use the main branch.
Pushing your changes
Now that you've updated your repo locally (aka saved your changes on your own machine), now you can send the changes over to GitHub.
Use the Push origin button on the top right and share your code with the world!
Video version
If you prefer a video, here you go!