Setting up Visual Studio Code
First launch
The first time you open VS Code, it'll ask you to sign in to use GitHub Copilot. You don't need to! Click Continue without Signing In, pick whatever color theme you like, and click Get Started.
Installing recommended software
Any time VS Code helpfully suggests that it can install something, just say yes! Python support, a linter, extensions to help you with such-and-such filetype, you don't need to know what it's for, just trust that VS Code is probably giving you good advice.
The code command
Warning
This is for macOS only! The code command comes preinstalled on Windows, so you don't need to run a command.
There's a magic command called code that you can install through VS Code.
- Open the Command Palette by pressing
Cmd+Shift+Pand typeshell commandto filter the big long list of commands. - Click Shell Command: Install 'code' command in PATH to... install the
codecommand!
That's it, you're done! If you have a command line open you'll need to restart it, though.
The settings menu
The settings menu allows you to adjust how VS Code works. There are a lot of them, so it's a great place to become acquainted with.
You can get to the settings menu by going to the top menu and selecting Code > Preferences > Settings.
You can get to the settings menu by going to the top menu and selecting File > Preferences > Settings.
To search, you just type in the search bar at the top and the list of settings is filtered.
Disable autocomplete on enter
Sometimes VS Code tries to be a little too helpful in suggesting code to you. This turns that off.
- Search in settings for
enter. - Set Editor: Accept Suggestions on Enter to off.
Set tabs as spaces
This one should already be set up, but we can make sure.
- Search for
tab space. - Make sure Editor: Insert Spaces is checked.
CAN YOU TRUST THIS FOLDER?
VS Code likes to ask if you can trust the files you're opening. Yes, you can!
If you get irritated that it keeps asking again and again and again, we can completely disable the prompt:
- Search in settings for
trust. - Under Security > Workspace > Trust, make sure "Controls whether or not Workspace Trust is enabled within VS Code" is unchecked.
Connecting VS Code to Python
Warning
Do this after you've installed Python and Jupyter.
VS Code has its own command line built in (View > Terminal), and it can run Jupyter notebooks, too. We want both of them to use the same Python we set up on the command line.
Installing the Python and Jupyter extensions
VS Code needs a couple of extensions to understand Python and Jupyter notebooks. Run this in your command line:
On macOS, this needs the
codecommand to be set up first.
If VS Code was open, close it and open it again.
Using Git Bash in VS Code
Nothing to do here! VS Code uses the same command line as Terminal.
VS Code uses PowerShell by default, so let's switch it to Git Bash.
- Open the Command Palette by pressing
Ctrl+Shift+Pand typedefault profile. - Click Terminal: Select Default Profile.
- Pick Git Bash.
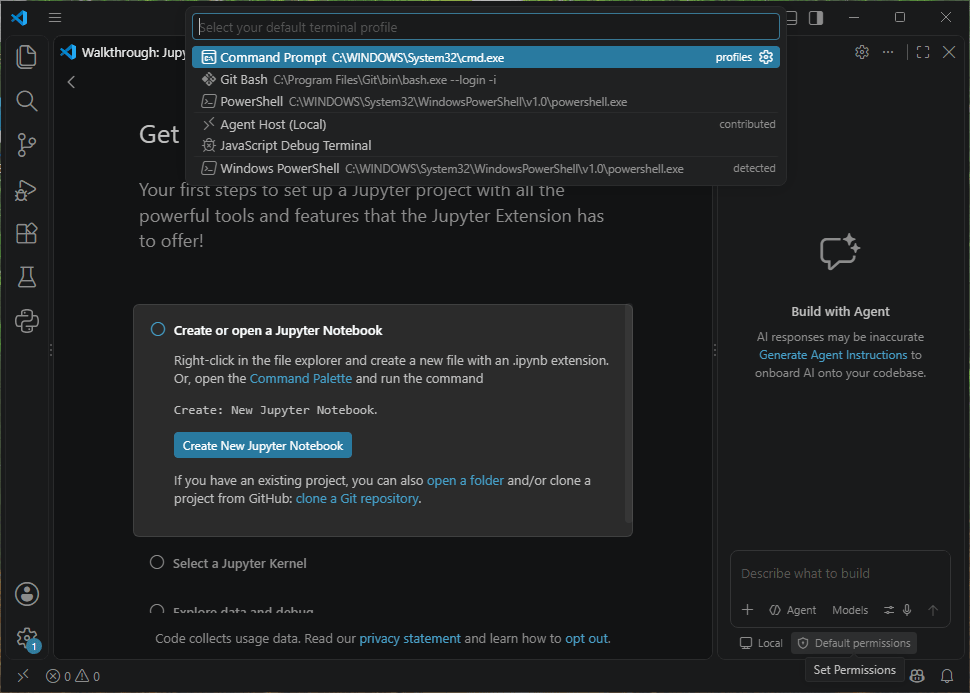
Open a new terminal with View > Terminal. You should see (data), just like in your normal command line.
Picking your Python
- Open the Command Palette (
Cmd+Shift+Pon macOS,Ctrl+Shift+Pon Windows) and typeselect interpreter. - Click Python: Select Interpreter.
- A list of Pythons pops up. Pick the one that starts with data (it's labeled Venv or Virtual Env).
The screenshots may show an older Python version. Choose your data environment running Python 3.14.
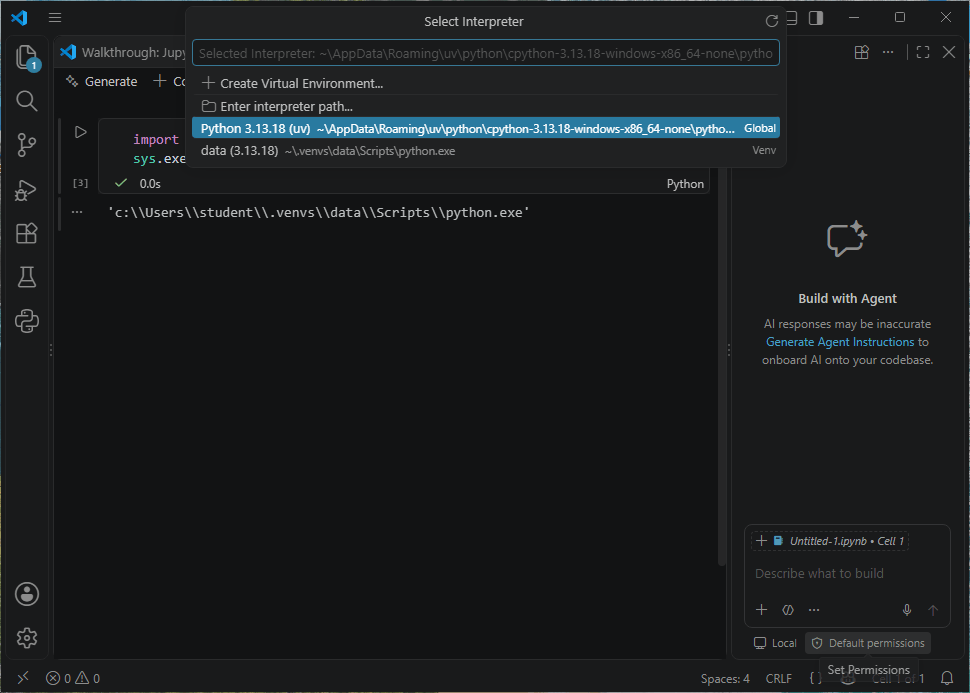
You'll also see a plain Python 3.14 labeled Global, and VS Code might even pick it for you automatically. Don't use that one! That's the Python uv uses behind the scenes, and it doesn't have any of your packages.
If you don't see data at all, click Enter interpreter path... and type in:
- macOS:
~/.venvs/data/bin/python - Windows:
~/.venvs/data/Scripts/python.exe
Picking your notebook kernel
When you open a Jupyter notebook in VS Code:
- Click Select Kernel in the upper right-hand corner.
- Click Python Environments...
- Pick data.
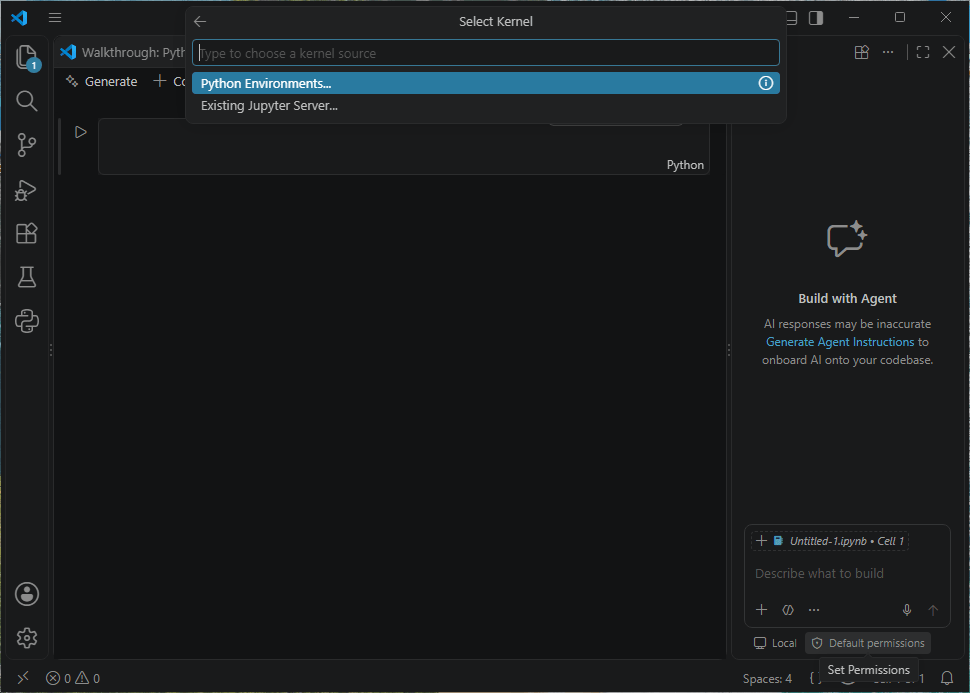
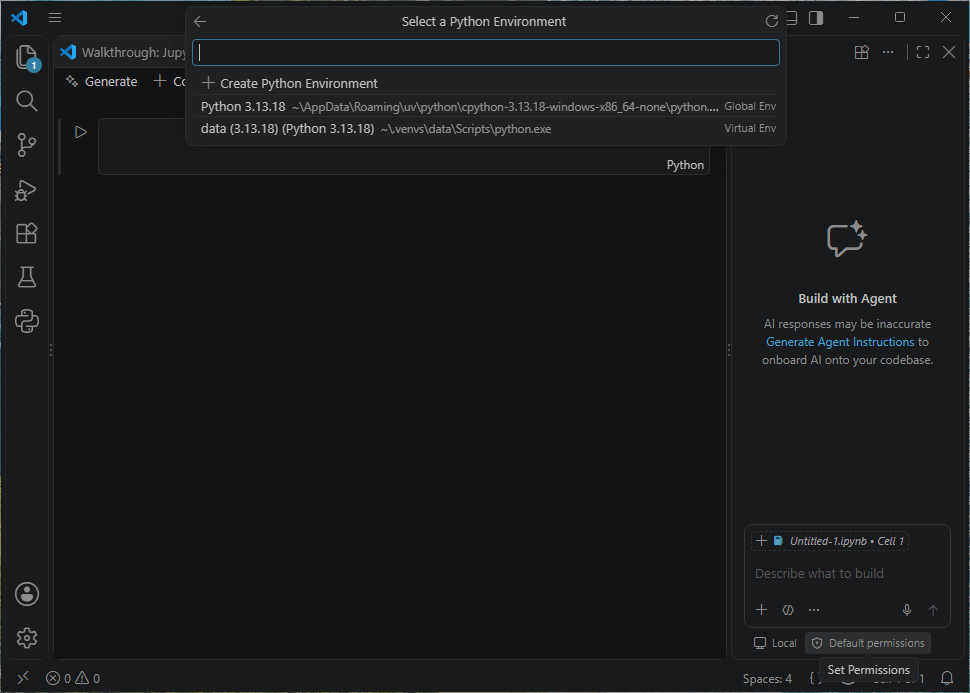
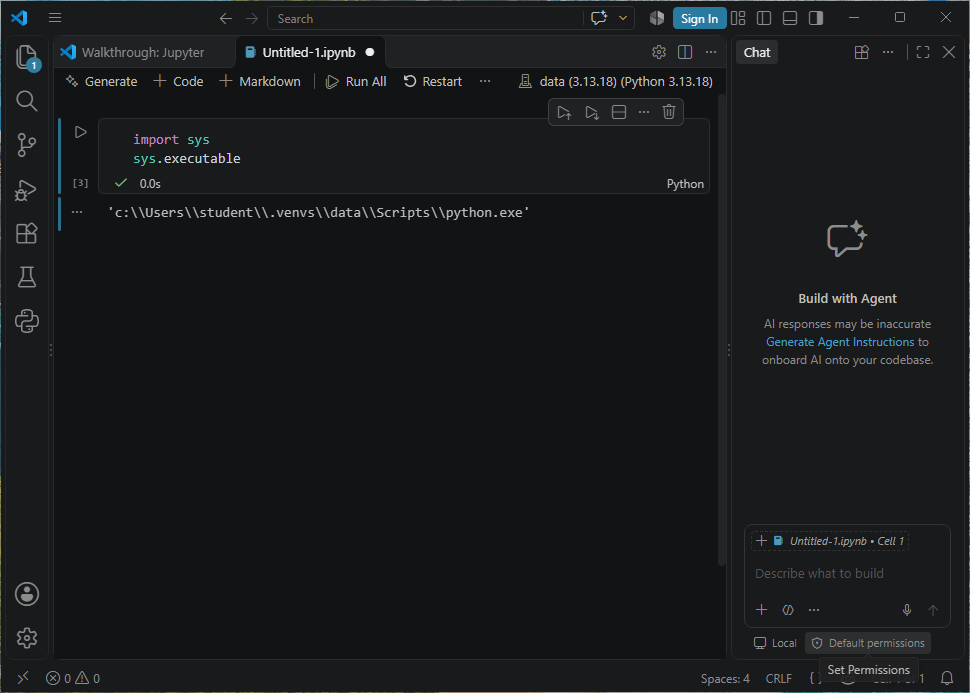
You can double-check it worked by running import sys and sys.executable in a cell. It should mention .venvs and data. Run sys.version to confirm it uses Python 3.14. If you rebuilt the environment, select data again and restart the notebook kernel.
Windows Firewall popping up?
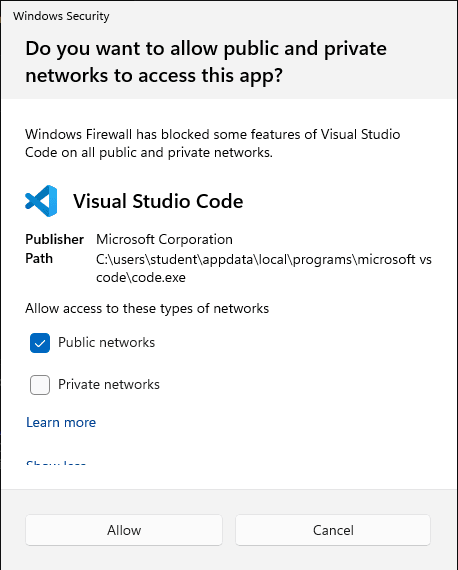
The first time you run a notebook in VS Code, Windows might ask Do you want to allow public and private networks to access this app? You can click Cancel. Your notebook only talks to your own computer, so it works fine either way.
What else?
You might find these links useful: